

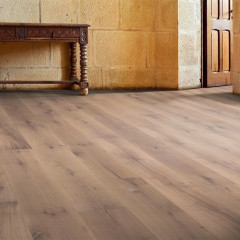
Home Improvement Guide
Laying Parquet Like a Pro: These Tips Will Help You Click the Floorboards!
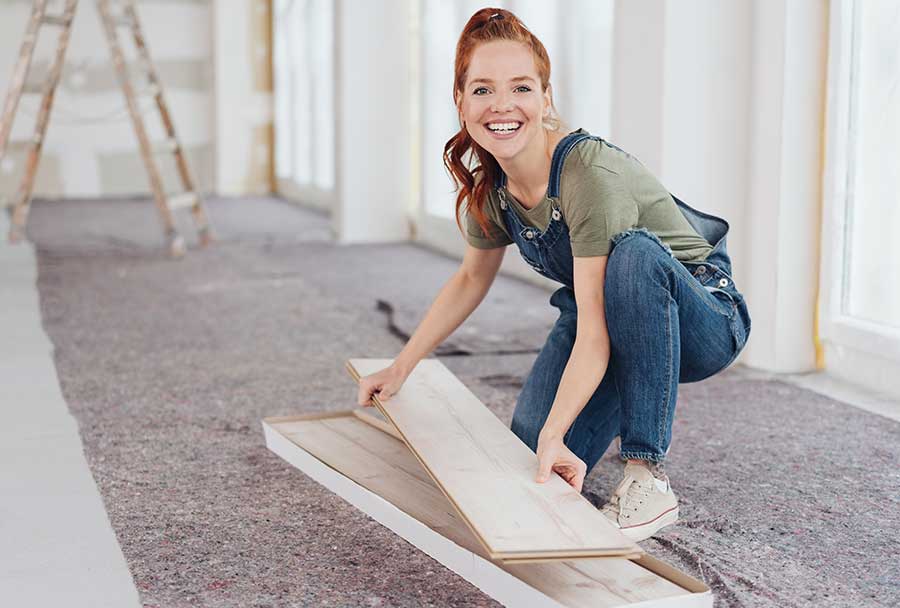
Ding-dong. Choose, order, pay – and your parquet delivery is at your doorstep. But how does it go from the package to your floor? Click-clack. You can easily lay the parquet yourself with a bit of handyman skill. We'll show you how to turn your floorboards into a dreamy wooden floor and when to call in a professional.
Laying Parquet – When Does It Float, and When Does It Stick?
The expert knows two different installation techniques for parquet floors: glue-down and floating installation. How do these methods differ, and which one is suitable for you?
Gluing Parquet Flooring
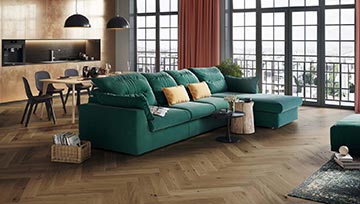
The classic parquet flooring consists of solid wood planks or solid strips that are glued together and to the subfloor by a professional. When there are changes in room climate, the wood doesn't expand and contract as much, which prevents unwanted gaps. Additionally, gluing reduces impact noise since there are fewer air cavities beneath the wood. This installation method is excellent for areas subjected to heavy wear and tear, such as a frequently used hallway or commercial space. It is also commonly used for popular patterns like herringbone parquet or various variations of strip parquet. Gluing parquet flooring is a skilled task that requires a professional.
Floating Installation of Parquet Flooring
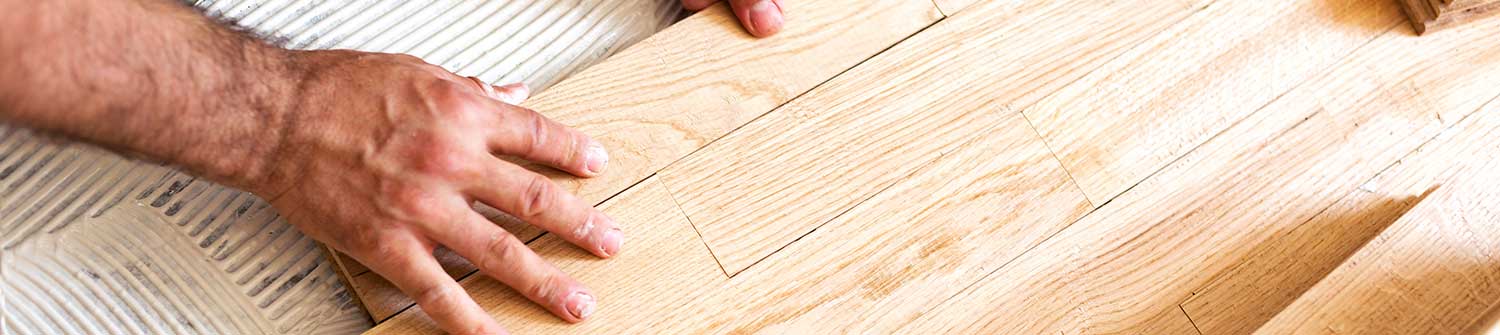
Prefinished or click parquet flooring has a multilayer structure that significantly reduces wood movement, making it easier to work with. You connect the individual planks using a tongue and groove system. Click – and the board is in place. No glue is necessary. When you install parquet flooring as a floating floor, you can disassemble it at any time, leaving no visible residue. This is perfect if you're only living in a place temporarily because you can take the disassembled parquet to your next residence. If a plank is damaged, no problem. Click the parquet flooring apart, replace the plank, and reassemble the parquet.
Parquet Flooring Installation – What Does Your Subfloor Look Like?
Just as your house needs a solid foundation, your parquet flooring needs an optimal base to feel comfortable and present its best side. The floor on which you plan to install the click parquet should be
- dry
- clean
- and level.
You can install the plank flooring on screed or on existing flooring materials such as wood, tiles, and stone. Carpet is not recommended as an underlay for hygienic reasons. Always ensure that the subfloors are not loose. Secure any wobbly wooden planks or tiles with screws or adhesive. You should also remove or level out any major irregularities so that the parquet sits evenly, reducing noise. When installing parquet over an existing flooring material, examine the existing conditions first. While it may seem less laborious not to remove the old floor, it can sometimes mean more work. Installing parquet raises your floor level, which might require removing doors, trimming frames, and installing new thresholds.

Getting Started - Preparatory Work for Parquet Flooring
Is it time to get started?
How Much Parquet Flooring Do I Actually Need?
Measure the room and calculate the floor area. Consider niches and recesses as well. Now, add about 5% for necessary waste. If your room has many protrusions, increase the allowance to 10%. The result is the square meters of parquet flooring you need. Divide this total by the square meters included in your favorite parquet package to determine how many packages of parquet flooring you need. If you have extra planks left over, that's great! It gives you replacements in case you need to replace a damaged plank over the years.
The Parquet Has Arrived!
Wood is a living material: it adapts to the surrounding climate and changes with temperature fluctuations and humidity. Before installing the click parquet, the planks must have the opportunity to acclimatize. Therefore, place the packages with the plank flooring in the room before installation:
- unopened
- for at least 48 hours
- at a room temperature of at least 18°C (64°F)
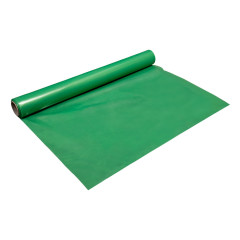
Vapor Barrier, Please!
The vapor barrier is a film that prevents moisture from below. It is necessary for all mineral substrates such as screed and concrete and in ground-level areas with or without a basement. Here's how to install it correctly:
- Step 1: Unroll the vapor barrier so that it overlaps the walls by at least 3 cm (1.2 inches).
- Step 2: Place the second sheet overlapping the first and glue the edge.
Fresh Screed?
For parquet flooring, the mineral substrate must be well dried. Experts recommend a maximum residual moisture content of 2%, preferably less (according to the CM method).
Sound Insulation - Is It Necessary?
Your neighbors don't have to move out when you're installing click parquet. Simply place a sound insulation underlay under the parquet. This offers several advantages:
- You protect your own hearing and reduce impact noise by up to 30%.
- Your neighbors hear your steps up to 20 decibels quieter.
- The layer additionally insulates the floor against rising cold.
- The impact sound underlay evens out small irregularities.
- The insulation layer provides a soft step that your joints will appreciate.
Lay the sound insulation underlay across the entire floor area without overlapping. Cut it to size using a utility knife. Would you like to save a step? Some manufacturers offer parquet flooring with integrated sound insulation. When you install these planks, you achieve an even better impact sound result because this technology further reduces the gaps beneath the individual parquet planks.
Caution! Do not cut into the vapor barrier with the knife. Otherwise, unwanted moisture may penetrate through the damaged area.
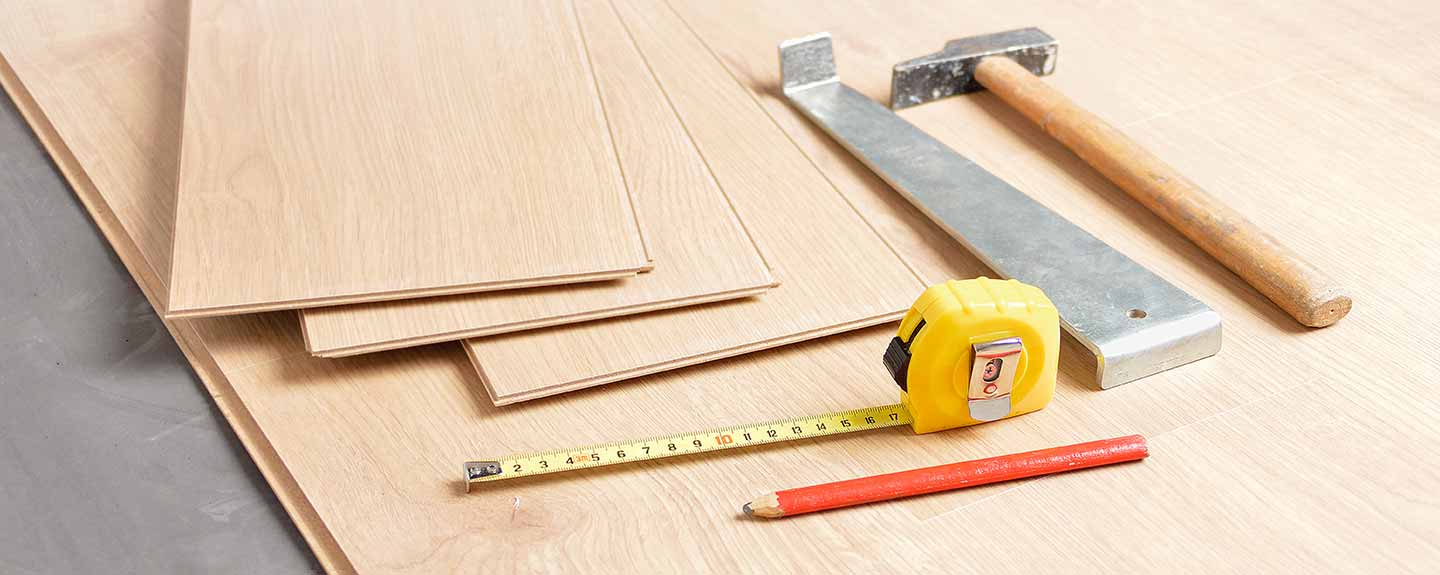
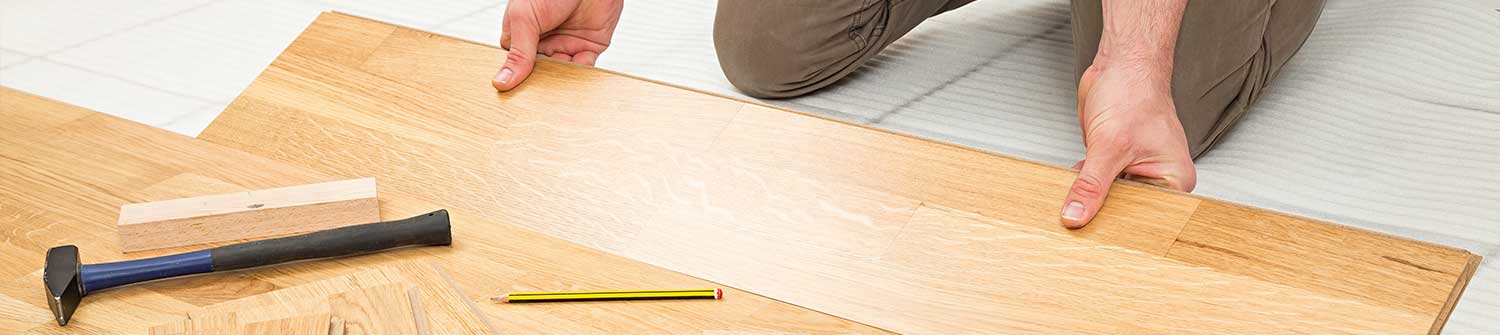
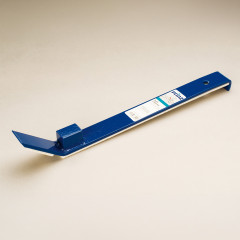
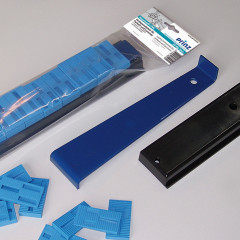
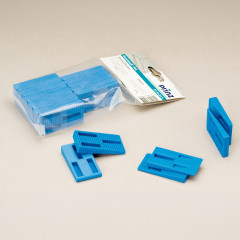
Tools: What You Need to Install Parquet Flooring Like a Pro
To install parquet flooring like a pro, use the right tools. Have a tape measure and pencil ready. You can't do without these aids. For the preparatory work, a utility knife is recommended. You'll also need the following tools for laying the plank flooring:
- Spacers
- A hammer
- A tapping block
- A pull bar
- And a square.
Finally, you'll need a saw – for example, you can use a table saw or a jigsaw. If necessary, you can borrow the appropriate tool from friends or a specialist retailer.
-
 Incl. 19% VAT , excl. Shipping Cost
 -
 Incl. 19% VAT , excl. Shipping Cost
 -
 Incl. 19% VAT , excl. Shipping Cost
 -
 Incl. 19% VAT , excl. Shipping Cost
 -
 Incl. 19% VAT , excl. Shipping Cost
DIY: Step by Step to Parquet Flooring
The preparations are complete, the wood has acclimated to the room's climate, and the saw is plugged in and ready to go? Then you're ready to get started!
In Which Direction?
Across or lengthwise?
Parquet flooring looks charming when it runs perpendicular to a wall with windows and exterior doors. This way, light enters parallel to the planks, creating a soft appearance. When laid perpendicular to the direction of light, the texture stands out more, giving a rougher, more original look.
When making your decision, keep in mind that perpendicular stripes emphasize width, while longitudinal stripes emphasize length. This allows you to play with the direction of the wooden floor and can make a room appear deeper or cozier.
Tip: Be cautious in very narrow hallways: if you lay the flooring across, you may lack the necessary plank length and stagger. In such cases, the floor may not have sufficient stability.
Aligning the Parquet:
- Take the time to calculate how many rows of parquet planks will fit in your room. This will allow you to center both the first and last rows. It's true that you may need to cut both rows lengthwise, but the better aesthetics will reward this extra effort.
- When aligning the first row of planks, consider not only the starting wall but also the two side walls. Particularly in older buildings, there are often crooked walls and quirky corners. In such cases, it's especially important to position the beginning of the floor at a right angle.
Offset – What's Important?
To ensure that the rows fit together securely, the end joints must not be too close to each other. Think of it like building with toy blocks. To make a tower stand solidly, you always connect an added toy block to the joint of the one below. How do you achieve this stabilizing effect with parquet flooring? Use the cut end piece from the first row to start the second row. This creates an offset that continues across the entire floor. There's a small rule to follow: the offset between the end joints should be no less than 30 cm from row to row.
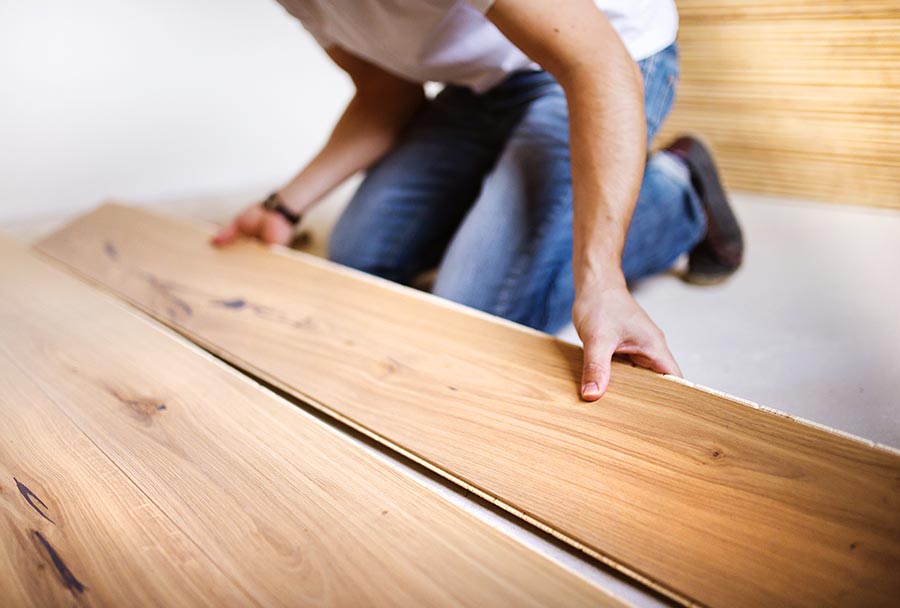
The Trick with the Click – How to Assemble Engineered Parquet
- End Joints: Lay your parquet planks from left to right. Connect the next plank to the end joint of the one lying down and slide them together.
With a small click, the connection snaps into place. If you can still see a minimal gap, gently tap it with a hammer and tapping block.
Position the tapping block so that you don't damage the plank. - Longitudinal Joints: For the next row of planks, connect the groove with the tongue. To do this, insert the engineered plank into the groove of the row lying below at an angle of about 25°.
In this position, you can still slightly wiggle the plank to the right or left. Once it's in the correct position, press the plank downward. It will click into place. If there's a small gap, use a hammer and tapping block to gently close it.
Spacing and Expansion Joints When Installing Parquet:
- Wall Spacing: Because wood can expand, the parquet flooring should not be placed directly against a wall. There must be a small gap of about 1.5 cm on all four sides. Use the spacing wedges placed there to prevent the parquet from shifting in either direction during installation. The baseboards will later cover the gap.
- Expansion Joints: In rooms adjacent to each other or in very large rooms (length or width over 10 meters), you should plan for an expansion joint. It's best to place it directly under a doorway or in front of a door frame. After laying the parquet, you can close the joint with a floor profile.
Properly Cutting Engineered Parquet Planks
To measure the end pieces of a parquet row effectively, flip the plank upside down so that you have the exact piece of plank that needs to be cut to fit in the gap between the wall and the adjoining plank. Mark the cutting edge with a square to ensure a straight cut. Especially when using a jigsaw, it's advisable to cut the plank with the front side facing down to prevent unsightly edges. Before attaching the remaining piece for the next row, check if the offset at the head joint will be at least 30 cm. If not, start with a new plank and cut it to fit.
Handling Complex Corners, Door Thresholds, and Radiator Pipes
- Measure corners precisely and always add the necessary wall spacing of 1.5 cm. A jigsaw is advantageous for cutting in these areas.
- When dealing with door thresholds and frames, you must also work precisely to ensure that the floor profile later covers the expansion joint completely. Regarding frames, you have two options: either shorten the frame with a coping saw and slide the floor underneath, or lay the parquet with a gap around it. In the second case, the gap will be visible and can only be closed with a sealing compound in a matching floor color. This is not an elegant solution from an aesthetic standpoint.
- Cutting holes for radiator pipes is a more advanced aspect of parquet installation. It's helpful if the radiator pipes are located on the side of the room where each parquet row starts. The starting piece is easier to fit than the ending piece. First, mark the holes for the radiator pipes correctly on the plank. Don't forget to add an extra centimeter to the diameter for expansion. For the cutout, draw a wedge from the circles to the end of the plank between the radiator pipes and the wall. First, cut out the wedge. Then, on both plank parts, cut out the semicircles. Finally, insert the plank into the parquet and glue the remaining wedge behind the radiator pipes. Seal the expansion joints later with rosettes.
Installing the Final Row of Parquet – A Masterpiece
Almost done! The last row of planks requires your full concentration once again. Room dimensions are rarely so ideal that the parquet ends with a whole plank. Therefore, as with the first row, you must cut the plank lengthwise. Turn it upside down to mark the measurements correctly and subtract the 1.5 cm wall spacing. To insert the individual plank correctly into the groove, you'll also need the tapping block. Angle the cut plank into the groove of the second-to-last row and gently press it down. Since there is little space against the wall, a small gap may remain in the joint with the next plank. Therefore, hook the end of the tapping block into the wall spacing and rest the other side on the plank. You may want to place something soft underneath to prevent damage to the parquet. Gently tap the tapping block with a hammer, and the plank will slide fully into place. Congratulations – you've successfully installed your own parquet!
-
 €19.90 pcsPackageprice: €19.90Regular Price €23.95 pcsIncl. 19% VAT , excl. Shipping Cost
 -
 €13.90 pcsPackageprice: €13.90Regular Price €16.95 pcsIncl. 19% VAT , excl. Shipping Cost
 -
 €19.90 pcsPackageprice: €19.90Regular Price €23.95 pcsIncl. 19% VAT , excl. Shipping Cost
 -
 €13.90 pcsPackageprice: €13.90Regular Price €16.95 pcsIncl. 19% VAT , excl. Shipping Cost
 -
 €5.90 pcsPackageprice: €5.90Regular Price €7.95 pcsIncl. 19% VAT , excl. Shipping Cost
A Little Detour: Parquet and Underfloor Heating
Underfloor heating is popular among homeowners and renovators due to its pleasant warmth. How do temperature fluctuations affect the raw material wood? Many parquet manufacturers approve their products in conjunction with a water-carrying underfloor heating system. Thanks to modern processing and layer construction, wood works less and therefore copes excellently with the changing temperatures of underfloor heating. What should you consider when combining parquet and underfloor heating?
- Not every underfloor heating system is suitable for parquet. It must not heat the environment too quickly, and the floor temperature should be around 26/27°C and not exceed 29°C.
- Manufacturers specify for each product whether it is suitable for underfloor heating and how it should be installed. Some planks can be laid floating, while others need to be glued down for underfloor heating. Use our expert advice. We are happy to assist you in making decisions and selections.
- You will need sound insulation with the appropriate thermal resistance for underfloor heating.
- Oak is an excellent choice in combination with underfloor heating. This wood type handles climatic changes better than, for example, maple or beech.
- The screed must have a residual moisture content of no more than 1.8% when using underfloor heating.
- Underfloor heating reduces humidity, which affects wood. Especially during the heating season, do not let the humidity drop below 40%.
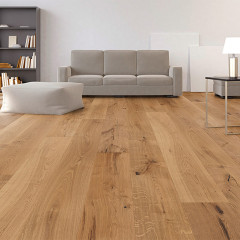
Laying Parquet Is Also for You
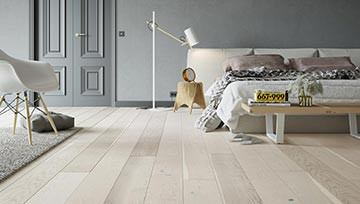
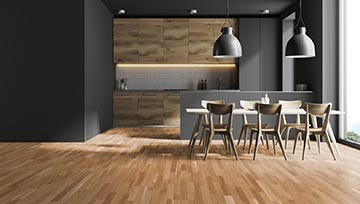
Timeless, elegant, and natural - parquet provides a cozy room atmosphere like few other floorings. With modern click parquet, this flooring option is not only affordable but can also be installed by DIY enthusiasts. The tongue-and-groove system clicks effortlessly into place, creating a stable connection. Forget about glue for pre-finished parquet! Today, you can quickly click the planks together and step onto the parquet immediately after installation. No more waiting times! Have you tried it yet? Browse through our selection and choose your dream parquet!
Comments